One of the many uses of an Arduino board is using it as an ISP (In-System Programmer). Which means burning bootloaders or programs without use of a bootloader directly to the ATmega CPU.
Why would somebody need to do that? Here is a real example.
I bought a 9 Degrees of Freedom Razor IMU a while ago. It is an Arduino compatible microcontroller with sensors in reality. Anyway, a small batch of these came with the wrong bootloader and I was lucky to get one of these. So, instead of sending it back and getting a new one I’d chose a simpler way. Burn the proper bootloader. There are ISPs out there that do the job just fine but for me it was an one time gig, thus I decided to go with an Arduino Mega ADK (which I have and I’ll refer to it simply as MegaADK) as an ISP.
A word of caution. This procedure worked for me. You might have a different hardware and it might not work well for you.
How to
- Download ArduinoISP sketch that lives in Examples folder of Arduino IDE (using latest version – 1.0) to MegaADK.
-
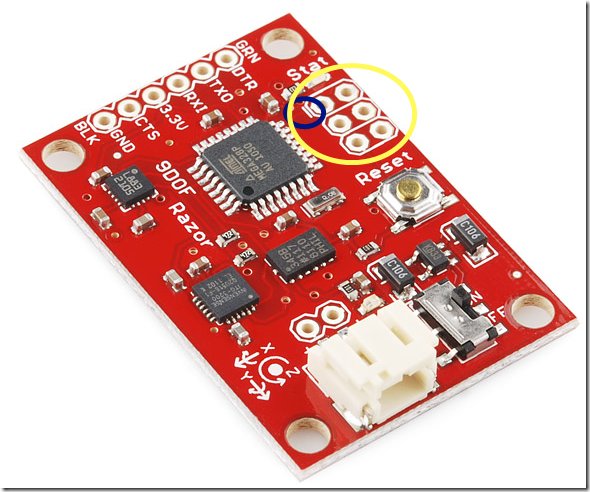
Connect MegaADK and Razor through SPI. (note: You will need to solder some pins to enable SPI on Razor). Pin 1 on Razor is marked with a white line (here you can find a diagram for SPI header).
Connect (from MegaADK to Razor) MISO->MISO, MOSI->MOSI, SCK->SCK and SS->RESET. Power for Razor is brought through USB (using 3.3V FTDI Basic Break board) but you can use other power sources.
Razor with marked pin 1 (blue) and SPI header (yellow)
(original photo taken from Sparkfun) - Using Arduino IDE select Tools/Programmer/Arduino as ISP and a target Tools/Board, which is Arduino Pro or Pro Mini (3.3V, 8Mhz) w/ ATmega328 in my case since ATmega328p is used on Razor.
- If everything worked properly you’d hit Tools/Burn Bootloader. But there is a bug in Arduino libraries that come with version 1.0. For some reason you have to find HardwareSerial.cpp source file (located in [Arduino setup folder]\hardware\arduino\cores\arduino. Edit the 43th line which goes like "#define SERIAL_BUFFER_SIZE 64” to “#define SERIAL_BUFFER_SIZE 128”. If the buffer isn’t set to 64 the burn process will most probably stop when it tries to burn data pages with error like this:
avrdude: stk500_paged_write(): (a) protocol error, expect=0x14, resp=0x64 - Hit the Tools/Burn Bootloader and wait for half a minute and there you go, a fresh bootloader is burned to the Razor and it can be programmed using classic Arduino way again.
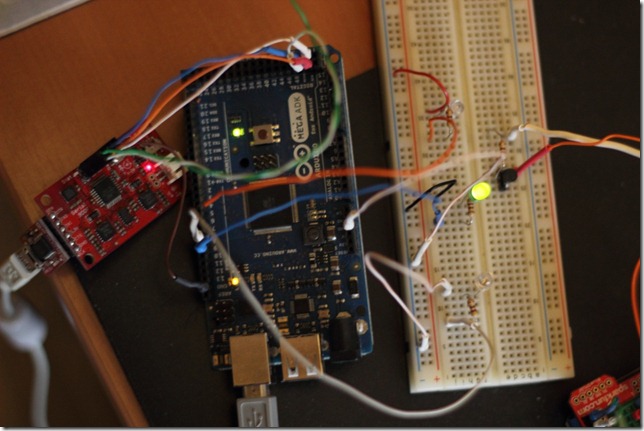
Photo of my setup:
On the left is Razor, on the centre is Arduino Mega ADK and on the right is a bread board for three LEDs that signal the status of the ISP (green, red and yellow signalling the burning in progress).
Using Arduino BT
I think that it is quite possibly to use the Arduino BT (Bluetooth version). I am mentioning BT version because it has an interesting quirk and a feature.
Reset pin
A program mode LED mentioned above is attached by default to pin 7. The problem is that pin 7 on BT version is used to reset the bluetooth module and shouldn’t be used for anything else. Even if you don’t connect the LED it will reset the bluetooth module and thus drop the connection between Arduino IDE and ArduinoBT once the burn process begins.
The remedy is quite simple. Before downloading ArduinoISP sketch to the ArduinoBT (step 1) you should modify the sources by changing the pin used for signalling the program mode. There are two occurrences:
#define LED_PMODE 7 and the other in void setup() procedure (not sure why the later isn’t using the former). Change number 7 to any other suitable pin and the Bluetooth connection won’t drop anymore.
Serial port speed
Bluetooth communication in ArduinoBT is supposed to run at 119200 bauds, but the ArduinoISP sketch is using 19200 bauds. Simply change the value in void setup() procedure to Serial.begin(119200);
There you go, ArduinoBT is a functioning ISP now.
Hope this article will help somebody.
